
Scan the QR code for table reservation
- Scan the QR code for table reservation to create a new order
- Purpose:
Scanning the table reservation QR code at the restaurant allows customers to conveniently and quickly order food using their smartphone.
- Usage conditions:
The system uses the table reservation QR code scanning method.
Customers must use a device capable of scanning QR codes and have an internet connection.
- Steps to follow:
Step 1: The user uses their personal phone to scan the code attached to the table they are sitting at.

Illustration of the screen displaying the table to be paid
Step 2: Select 'Create New Order' to begin ordering

Illustration showing the popup to select 'Create New Order'
Step 3: The user selects the number of guests
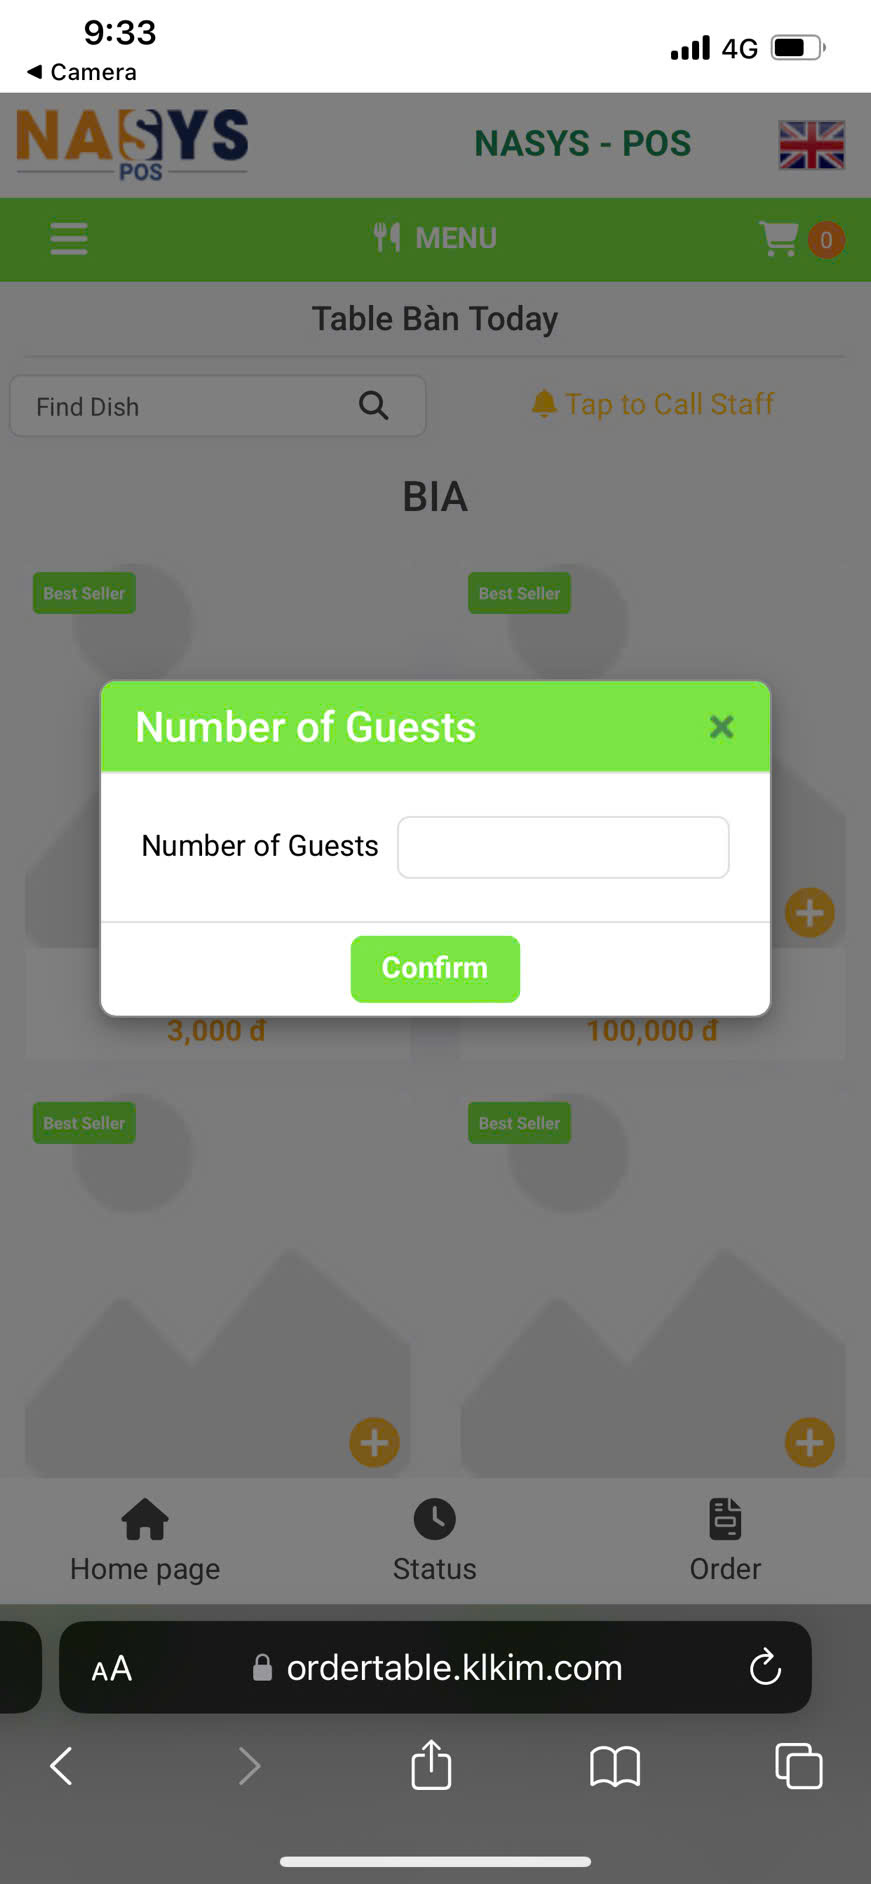
Illustration of the user entering the number of guests
Step 4: The user selects dishes and adds them to the cart
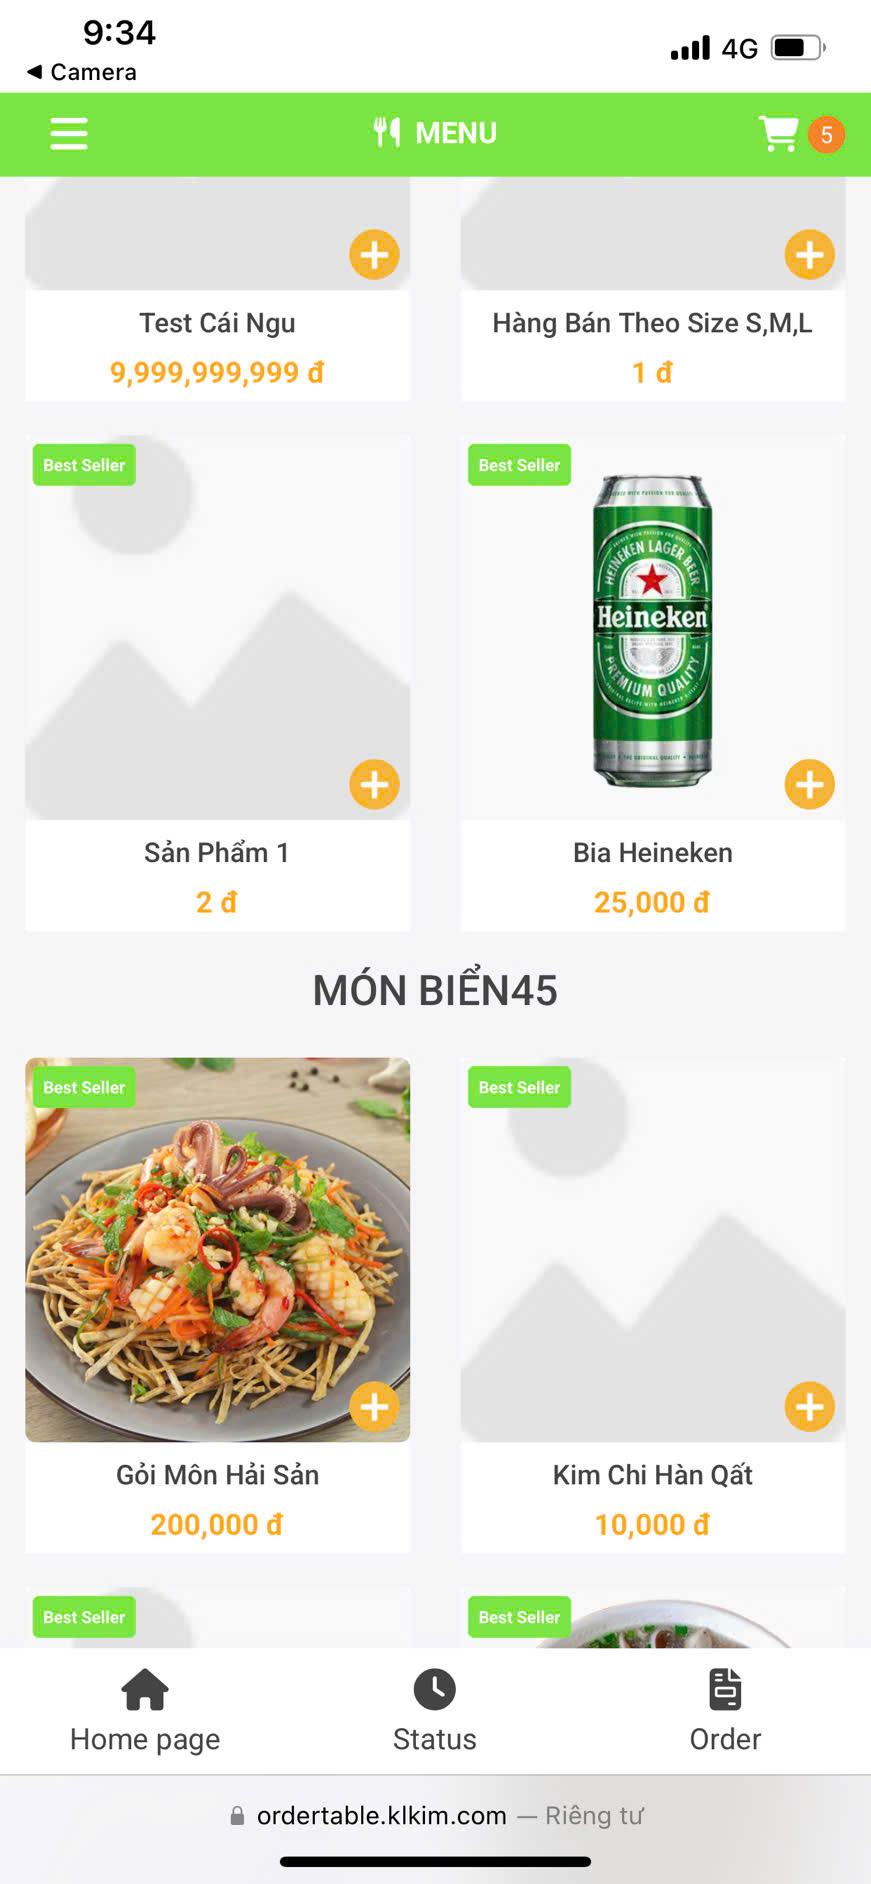
Illustration of selecting dishes and adding them to the cart
Step 5: The user selects the cart to proceed with the order
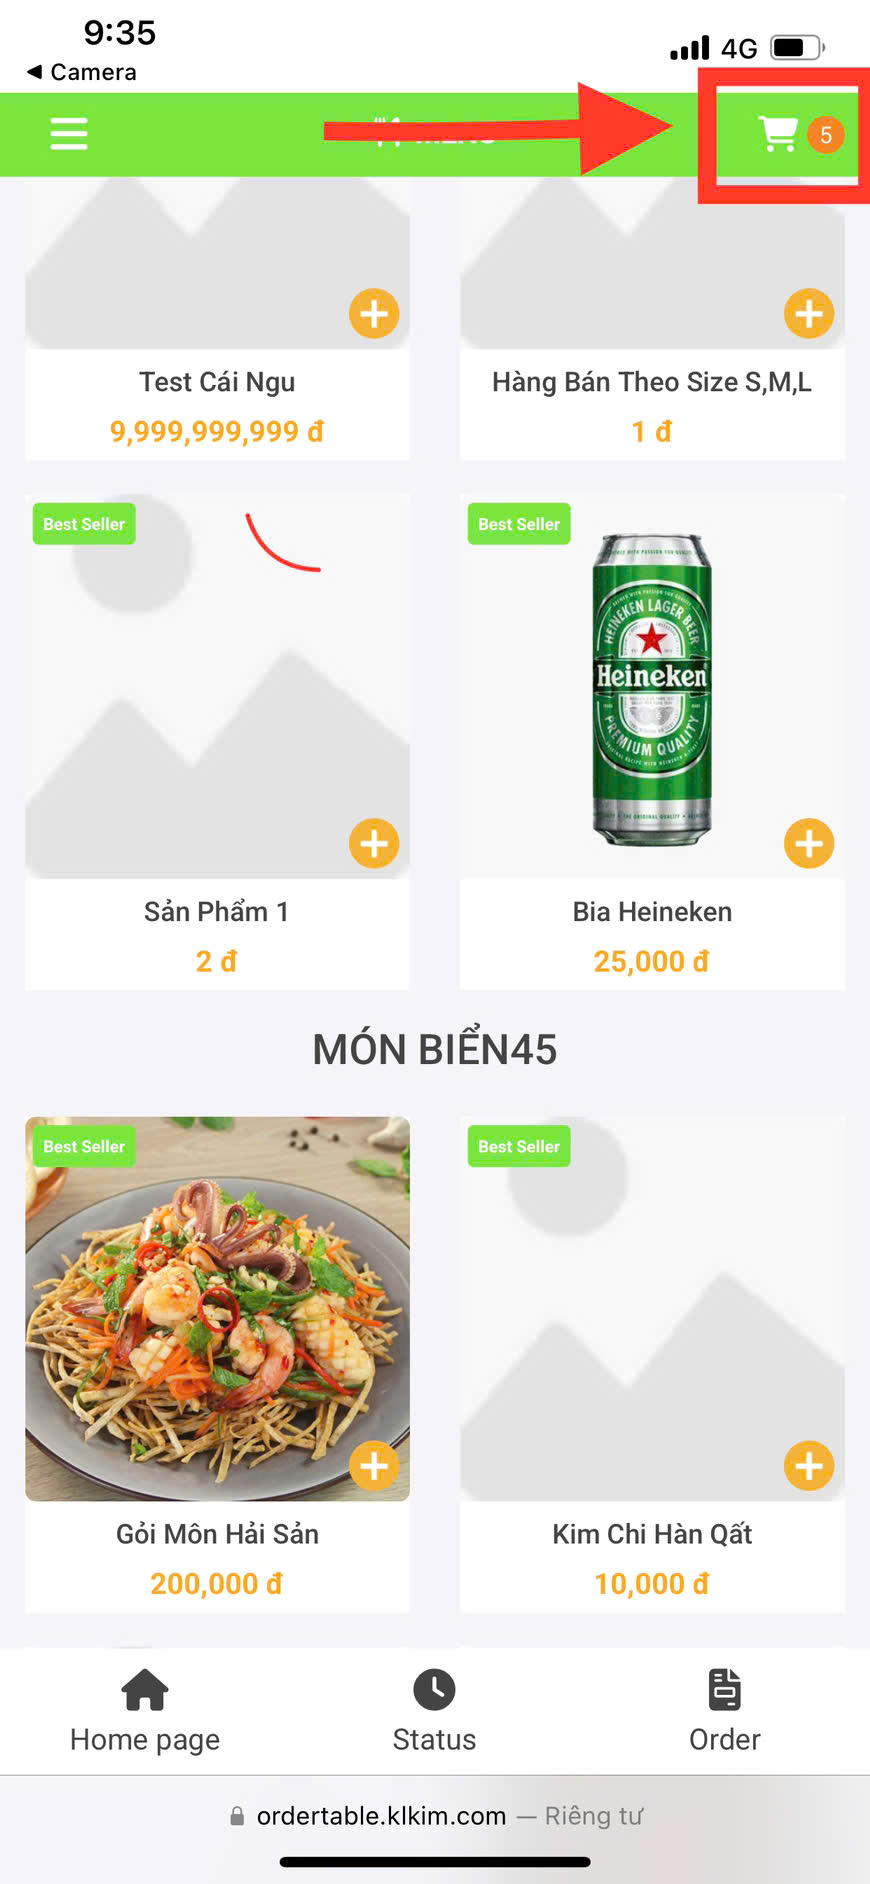
Illustration of selecting the cart to place the order
Step 6: The user clicks 'Place Order' to send the order to the reception department
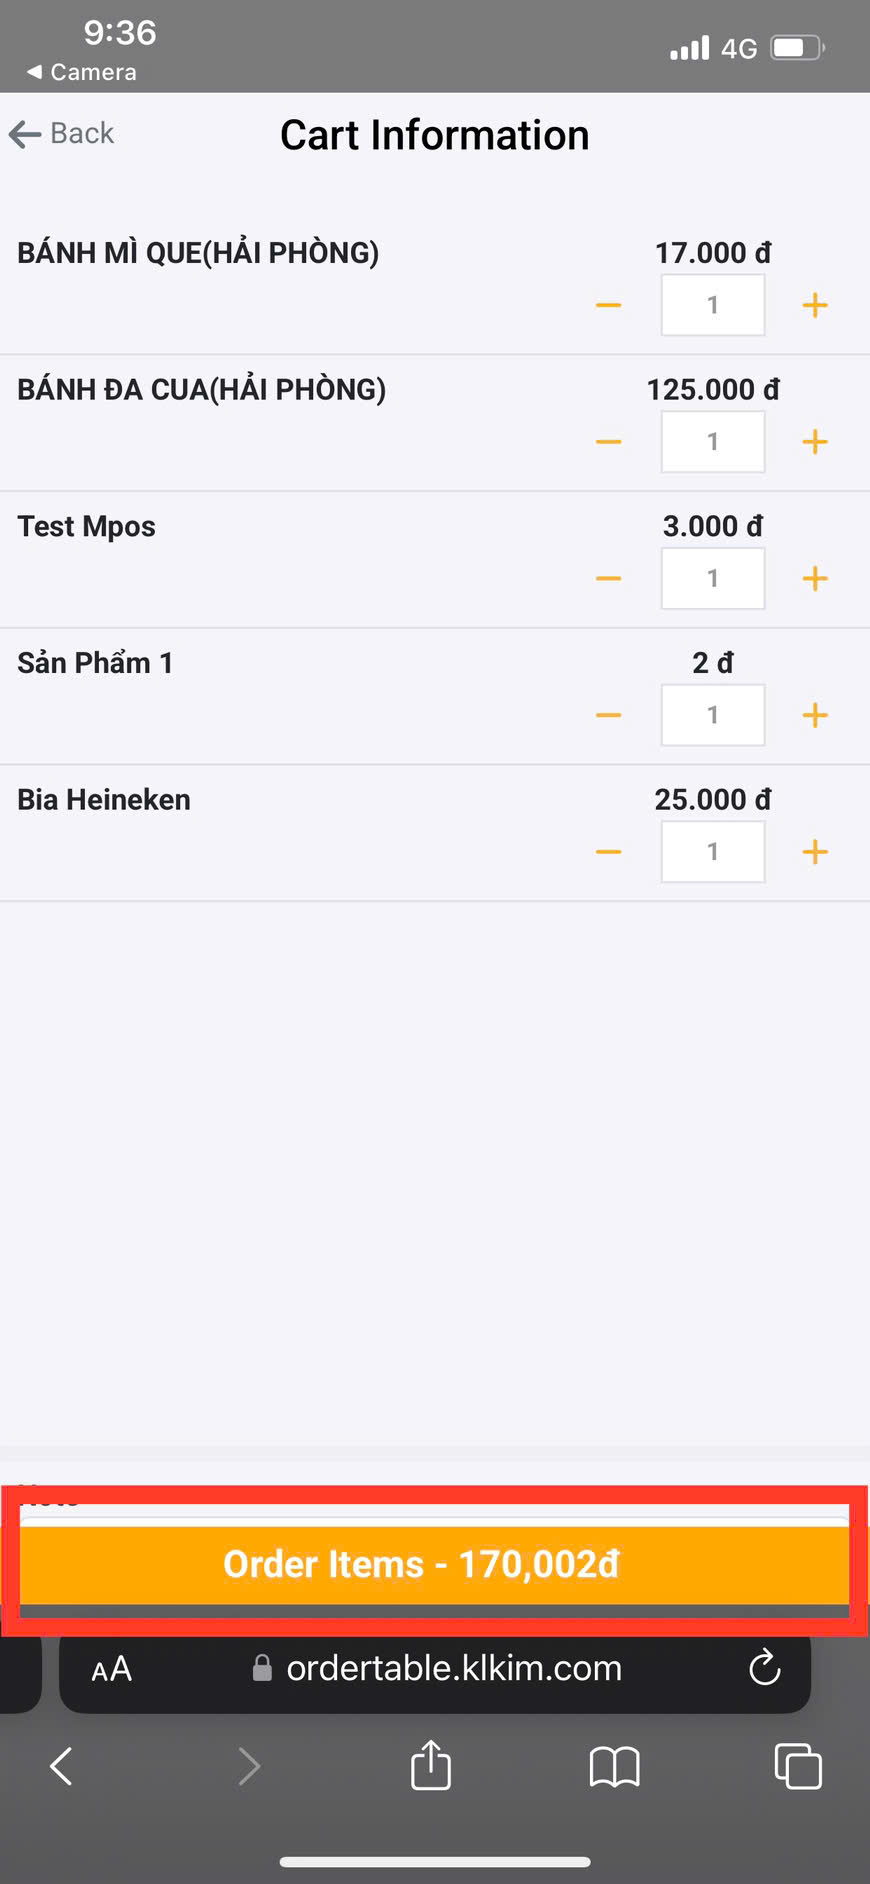
Illustration of placing an order
Step 7: The system displays a successful order notification
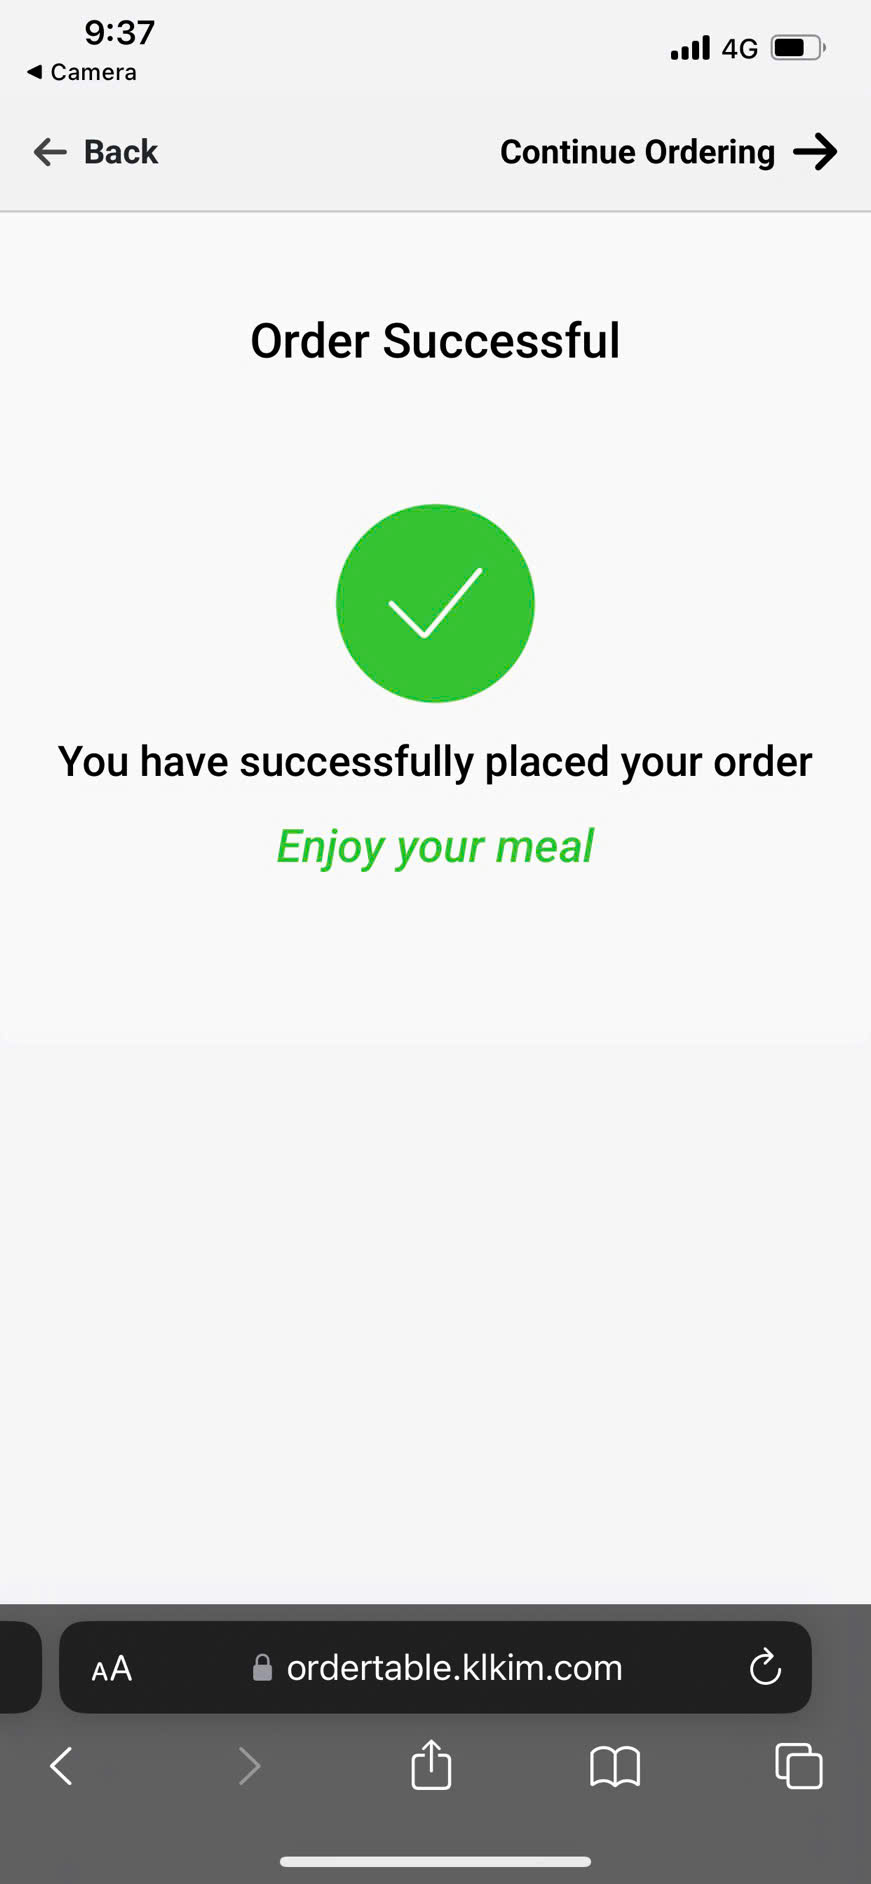
Illustration of a successful order notification
- Scan the table reservation QR code to join an existing order
- Purpose:
Scanning the table reservation QR code to join a shared order allows users to easily share their order information by copying the code or sharing the QR code with others who are joining the order.
- Usage conditions:
The code has been shared with the person who needs to join the order.
- Steps to follow:
Step 1: The user uses their personal phone to scan the code attached to the table they are sitting at.
Illustration of scanning a QR code
Step 2: Select to join a shared order

Illustration of selecting to join a group order
Step 3: Enter the code to join a group order

Illustration of entering the code to join a group order
Step 4: The user selects dishes and adds them to the cart
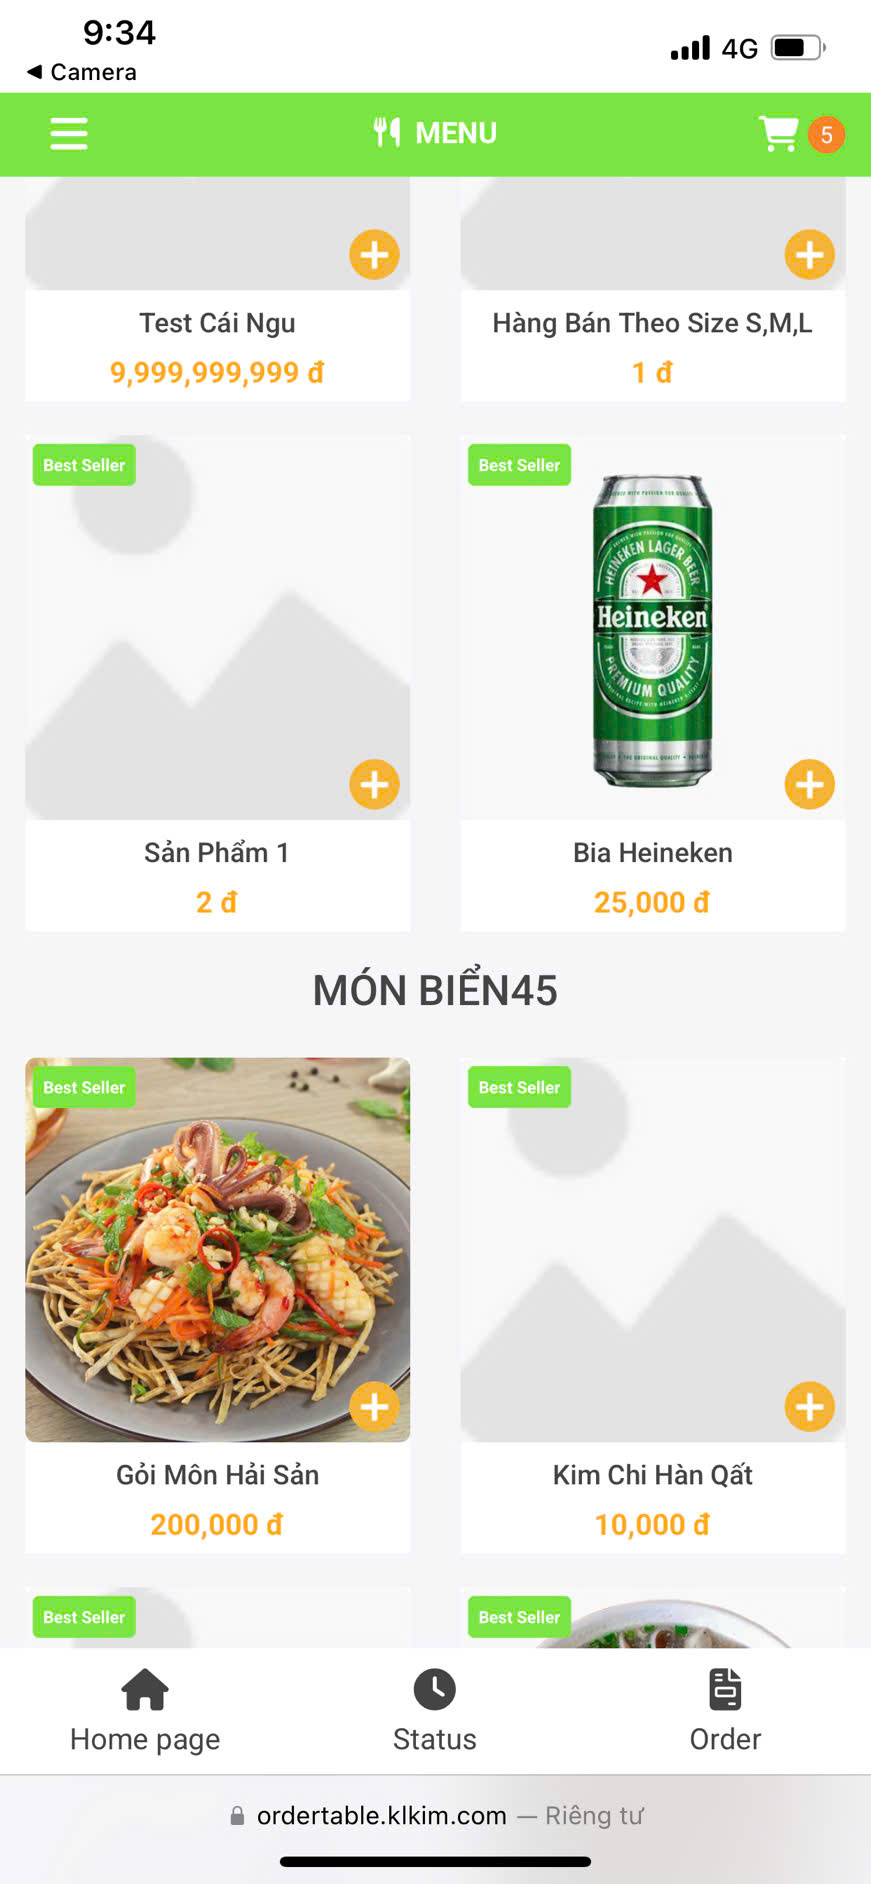
Illustration of selecting items and adding them to the cart
Step 5: The user selects the cart to proceed with the order
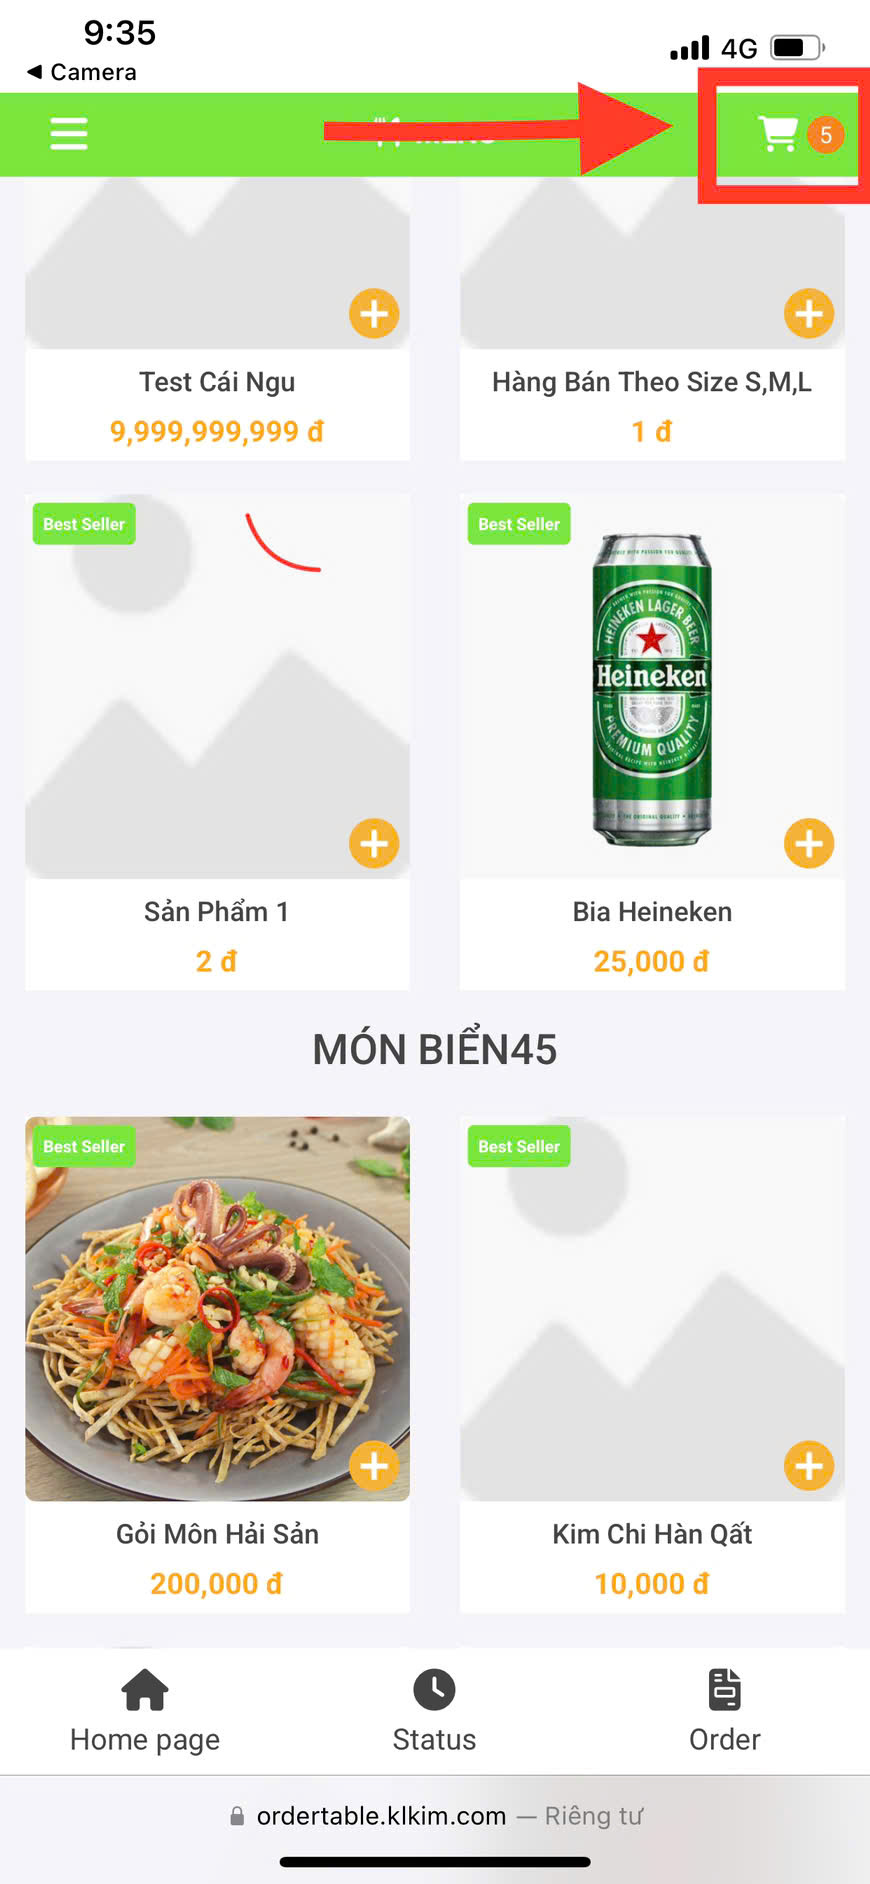
Illustration of selecting the cart to place the order
Step 6: The user clicks 'Place Order' to send the order to the reception department
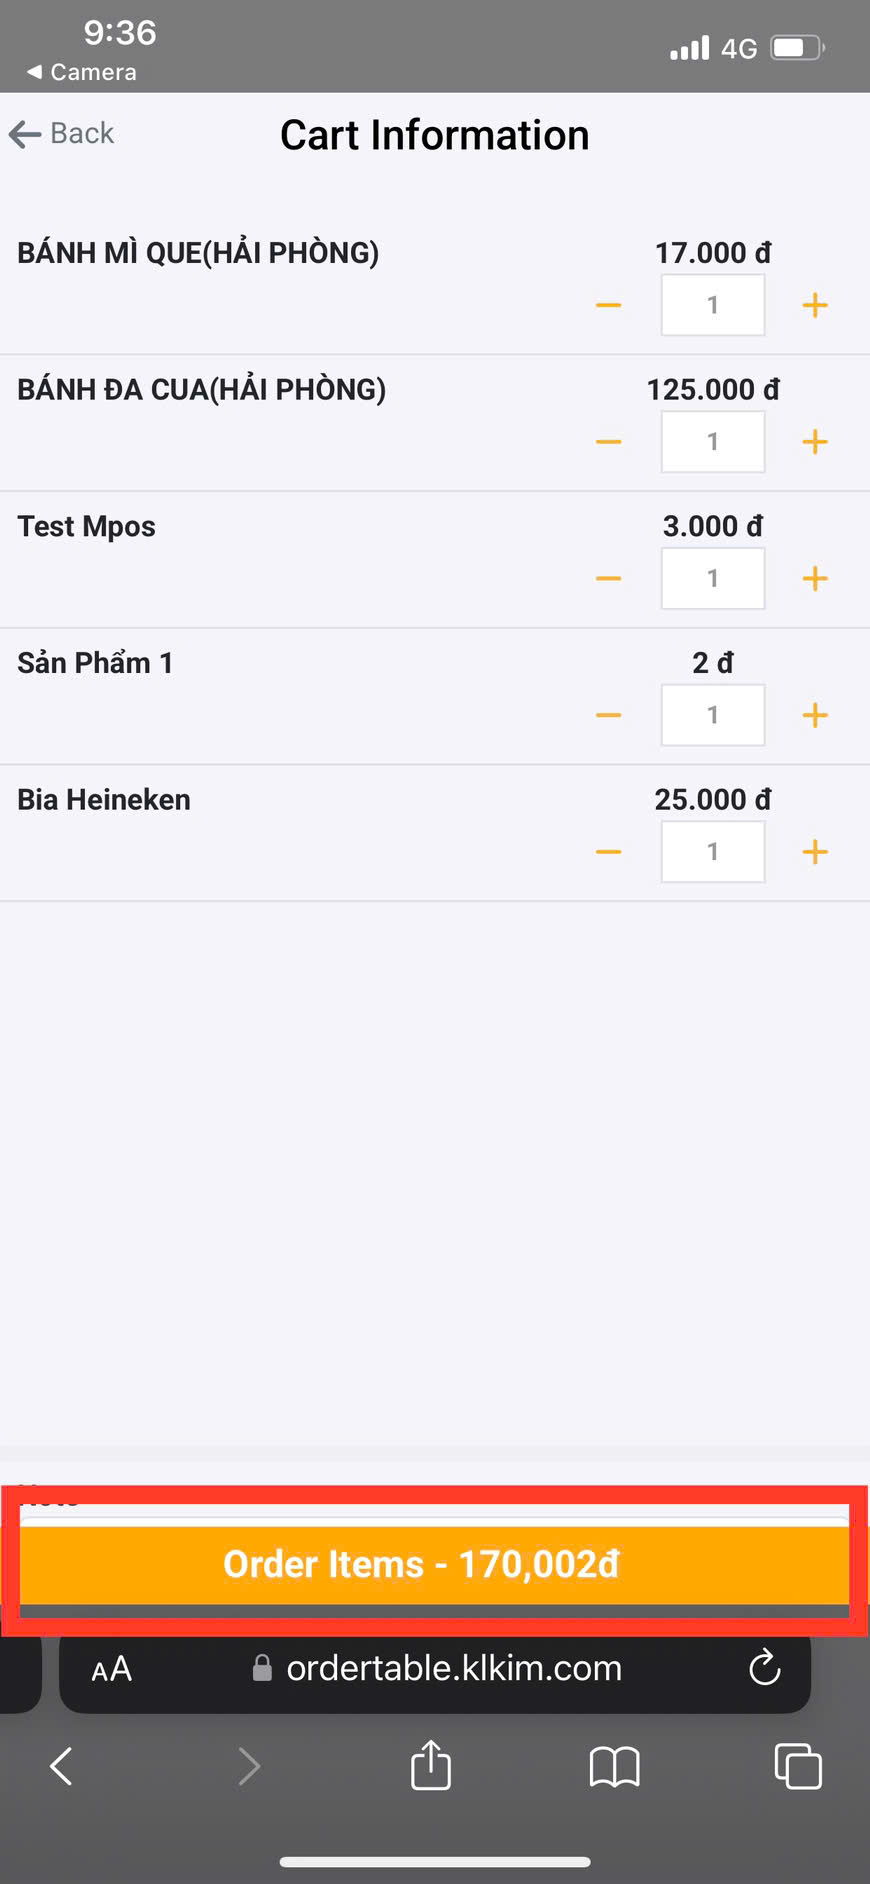
Illustration of placing an order
Step 7: The system displays a successful order notification
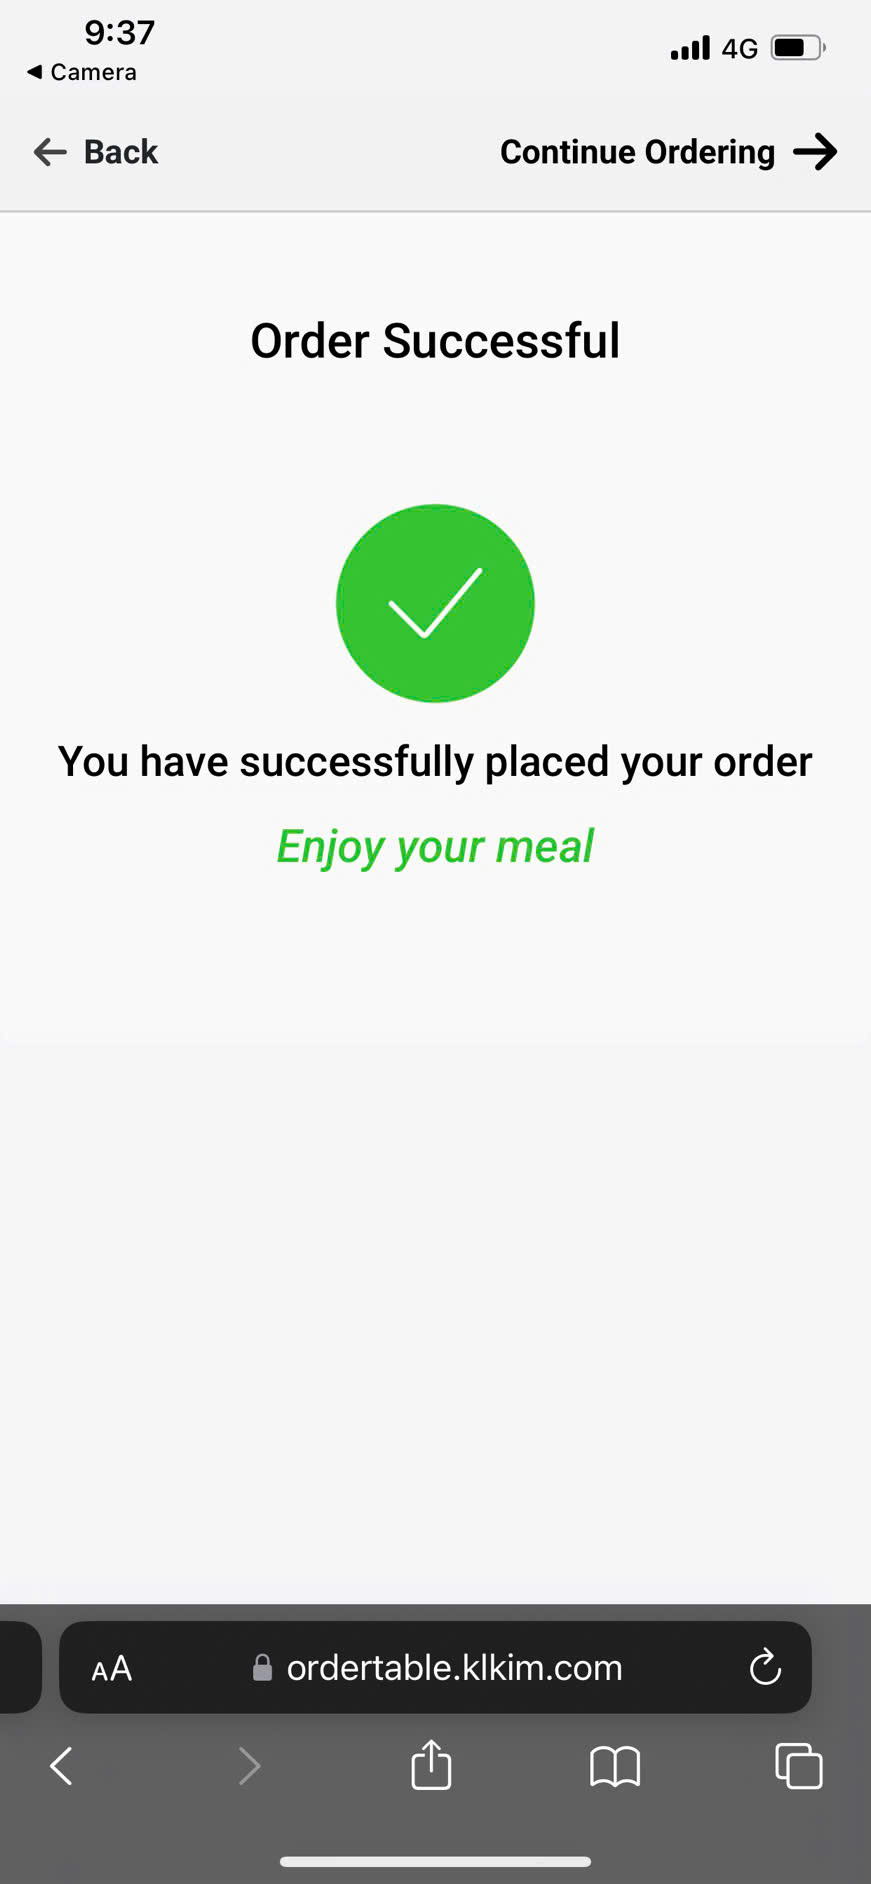
Illustration of a successful order notification
Step 8: Share the code with your tablemates to place a group order

Illustration of copying the code